Create Transit Gateway Attachments
Overview
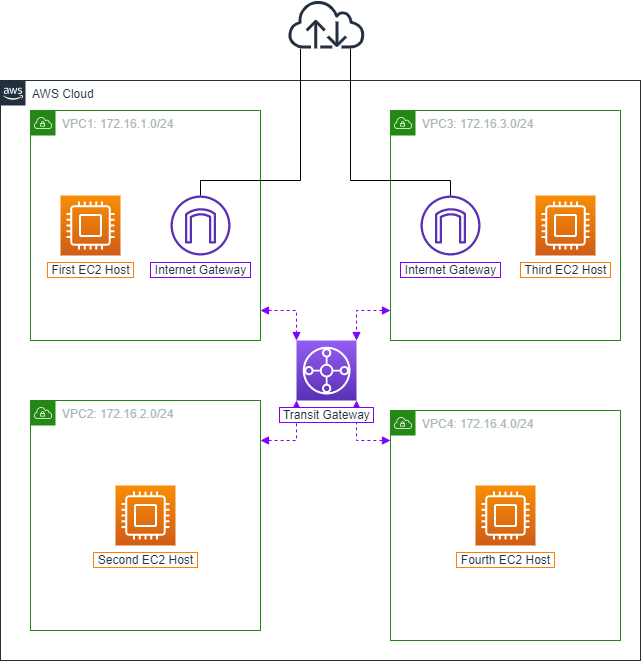
ℹ️ Information: In this section, you will create Transit Gateway Attachments to connect your VPCs to the Transit Gateway. Each attachment enables communication between the VPC and the Transit Gateway.
Create Transit Gateway Attachments
- Access VPC Management Console
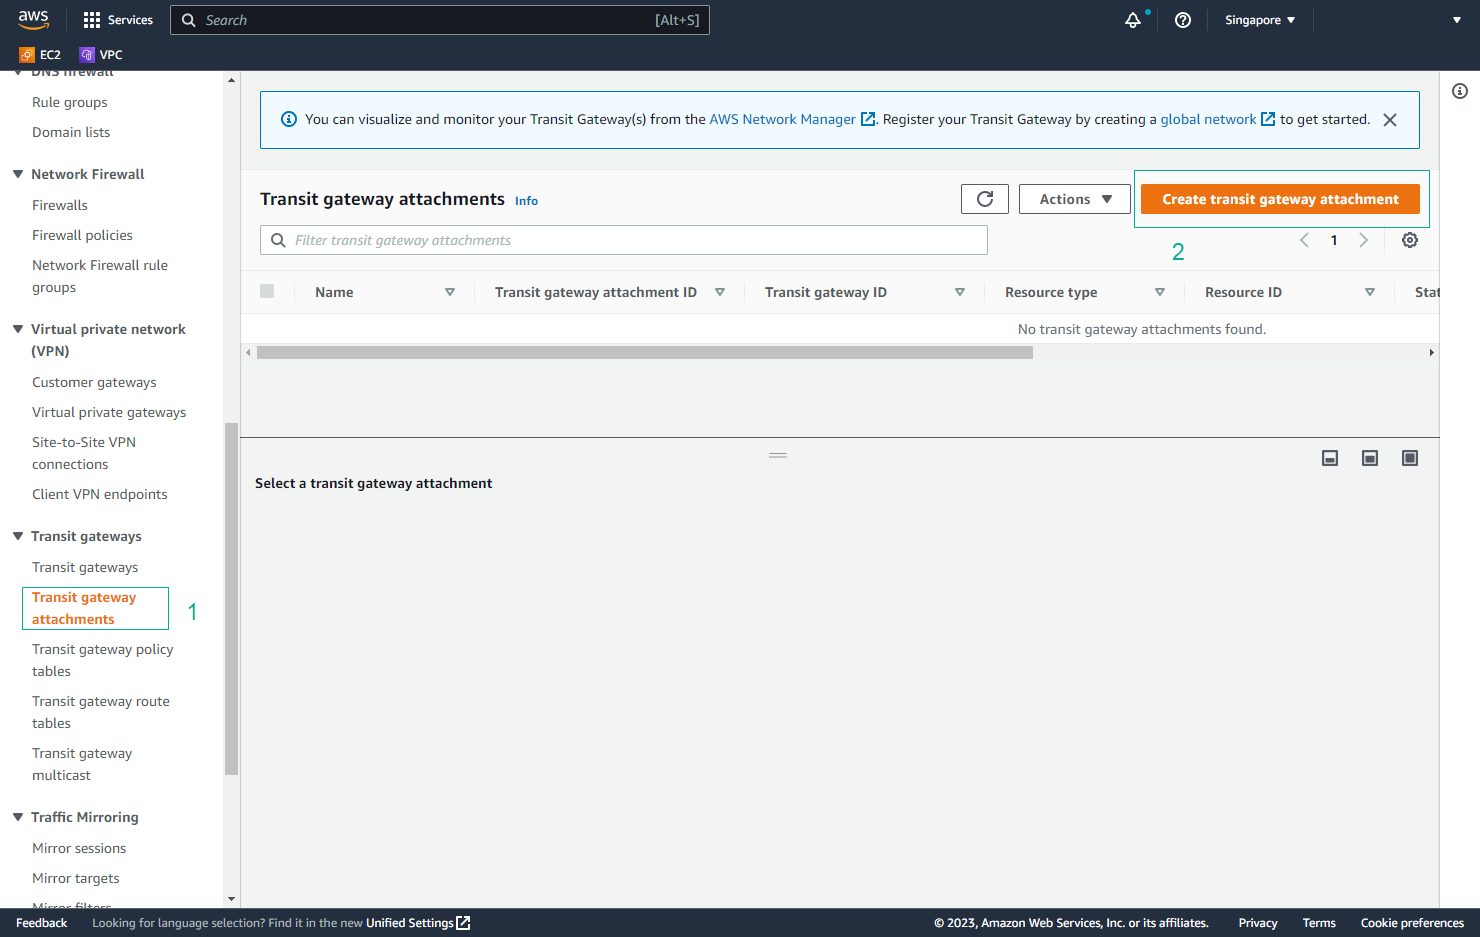
- Open the VPC Management Console
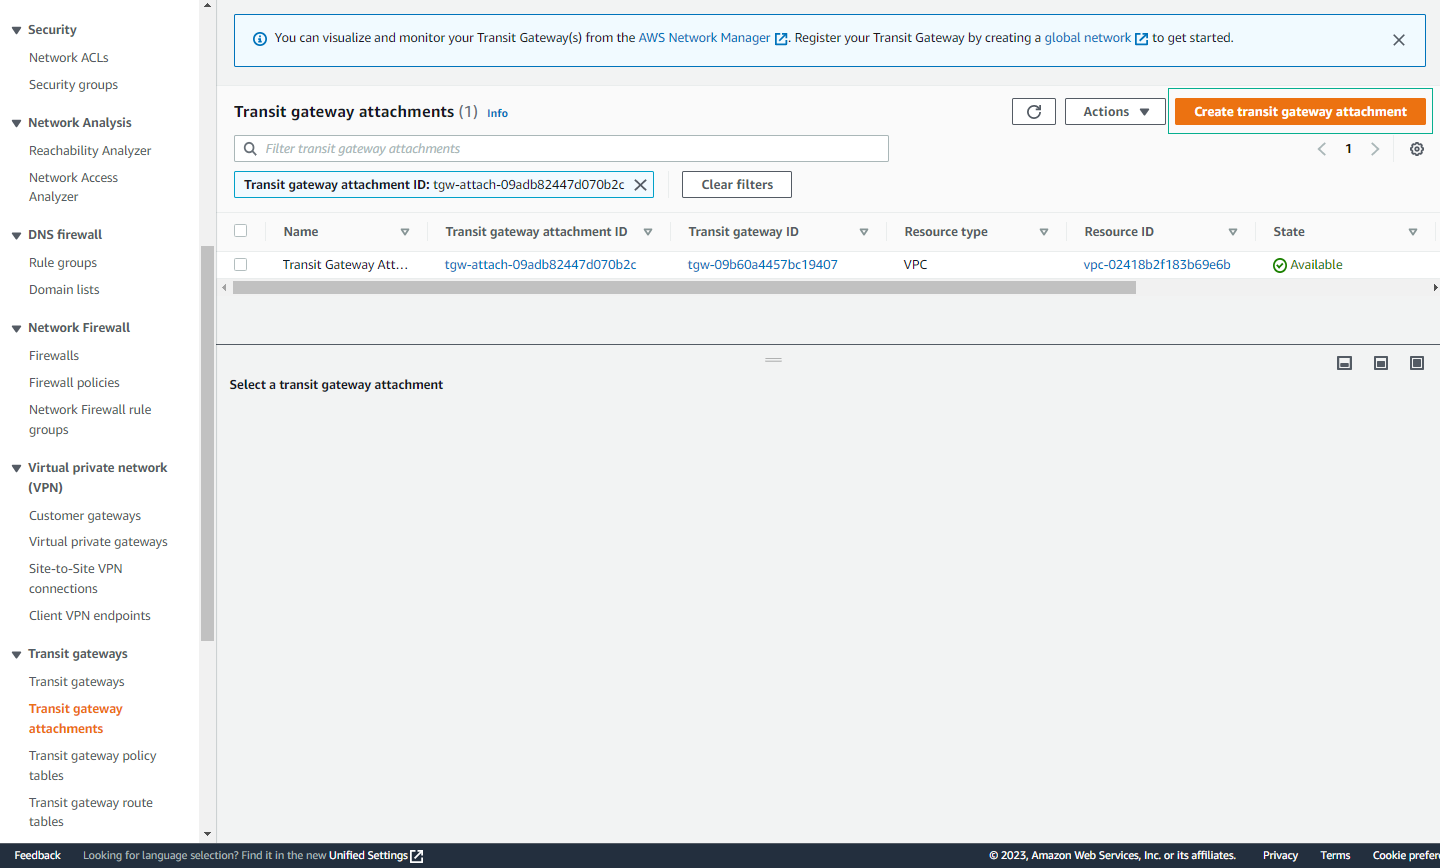
- Select Transit Gateway Attachments in the left sidebar
- Click Create Transit Gateway Attachment
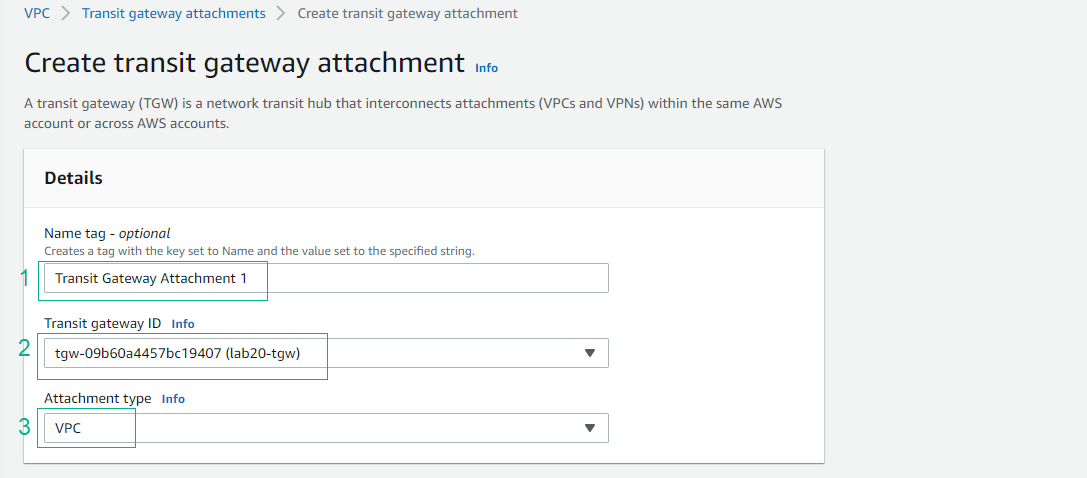
- Configure Attachment Settings
- Transit Gateway ID: Select your created Transit Gateway
- Attachment type: Select VPC
💡 Pro Tip: Choose the correct Transit Gateway ID to ensure proper connectivity.
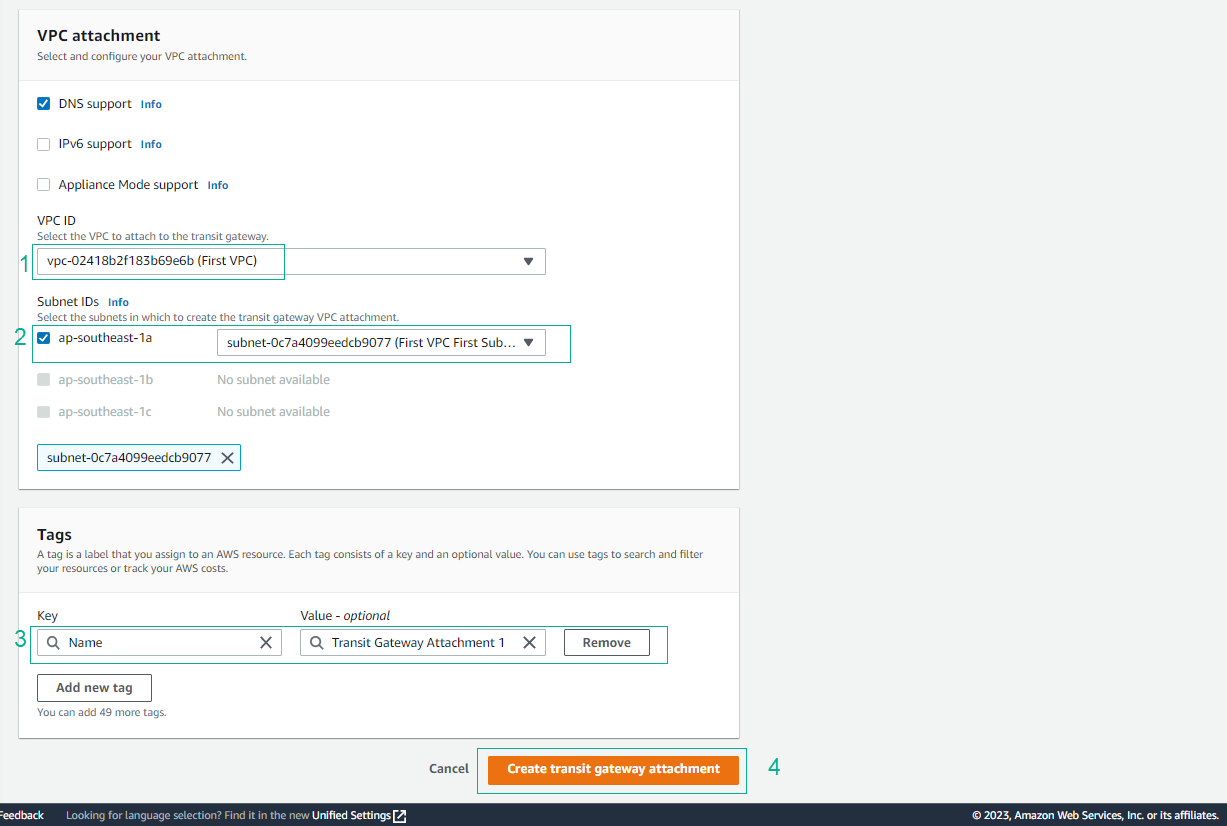
- Configure VPC Settings
- Attachment name tag: Enter VPC identifier (e.g., VPC1)
- VPC ID: Select the first VPC (VPC1)
- Subnet ID: Select the subnet in the desired AZ
ℹ️ Information: Each VPC requires a separate attachment. The subnet selection determines the AZ for the attachment.
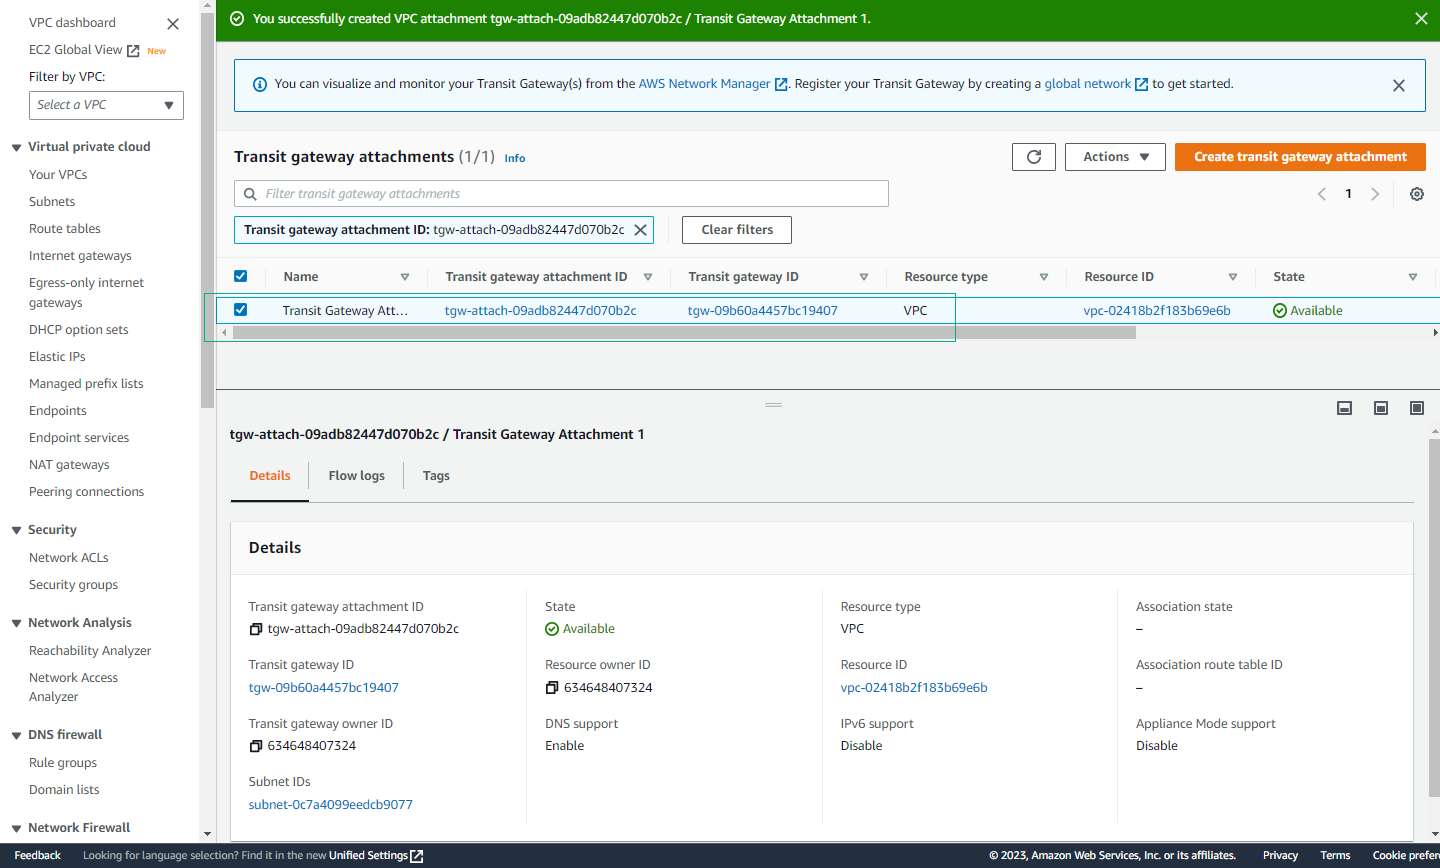
- Verify First Attachment
- Confirm successful creation of Transit Gateway Attachment for VPC1
- Create Remaining Attachments
- Repeat the process for VPC2, VPC3, and VPC4
- Use appropriate VPC IDs and subnet selections
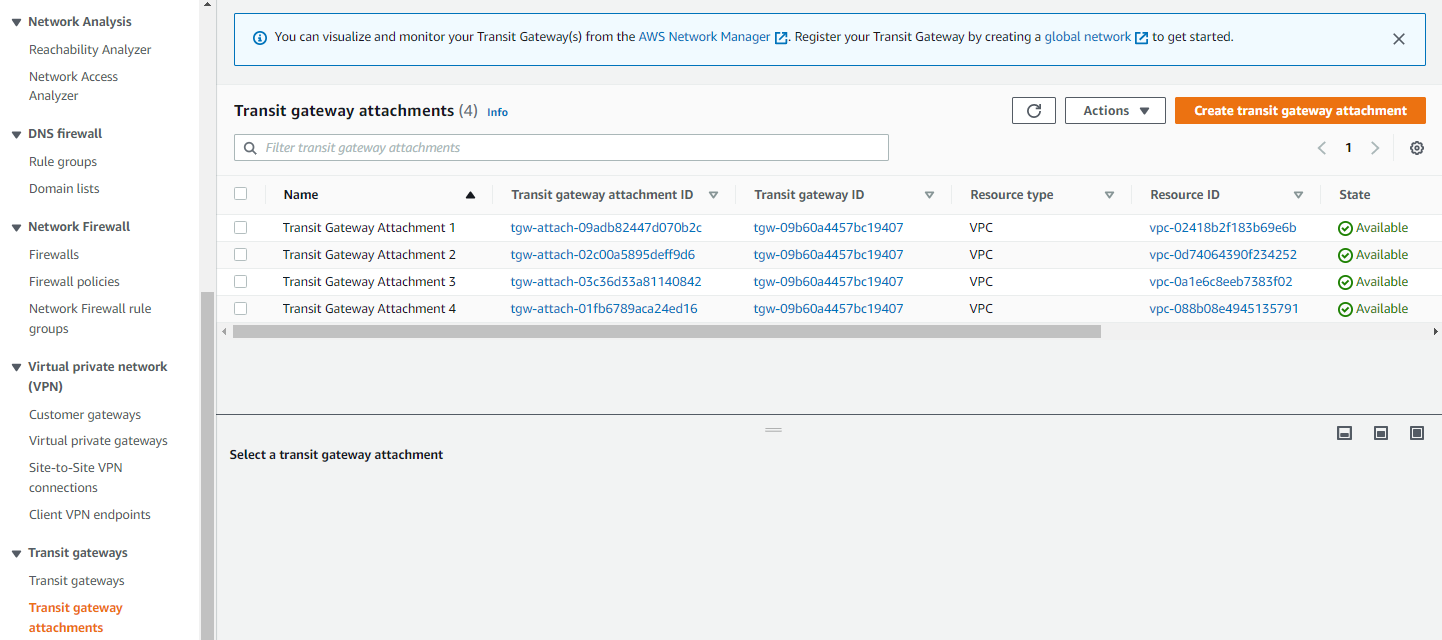
- Verify All Attachments
- Confirm all four Transit Gateway Attachments are created successfully
- Verify status shows as “available” for each attachment
⚠️ Warning: All attachments must be in “available” state before proceeding with route table configuration.
Test Connectivity
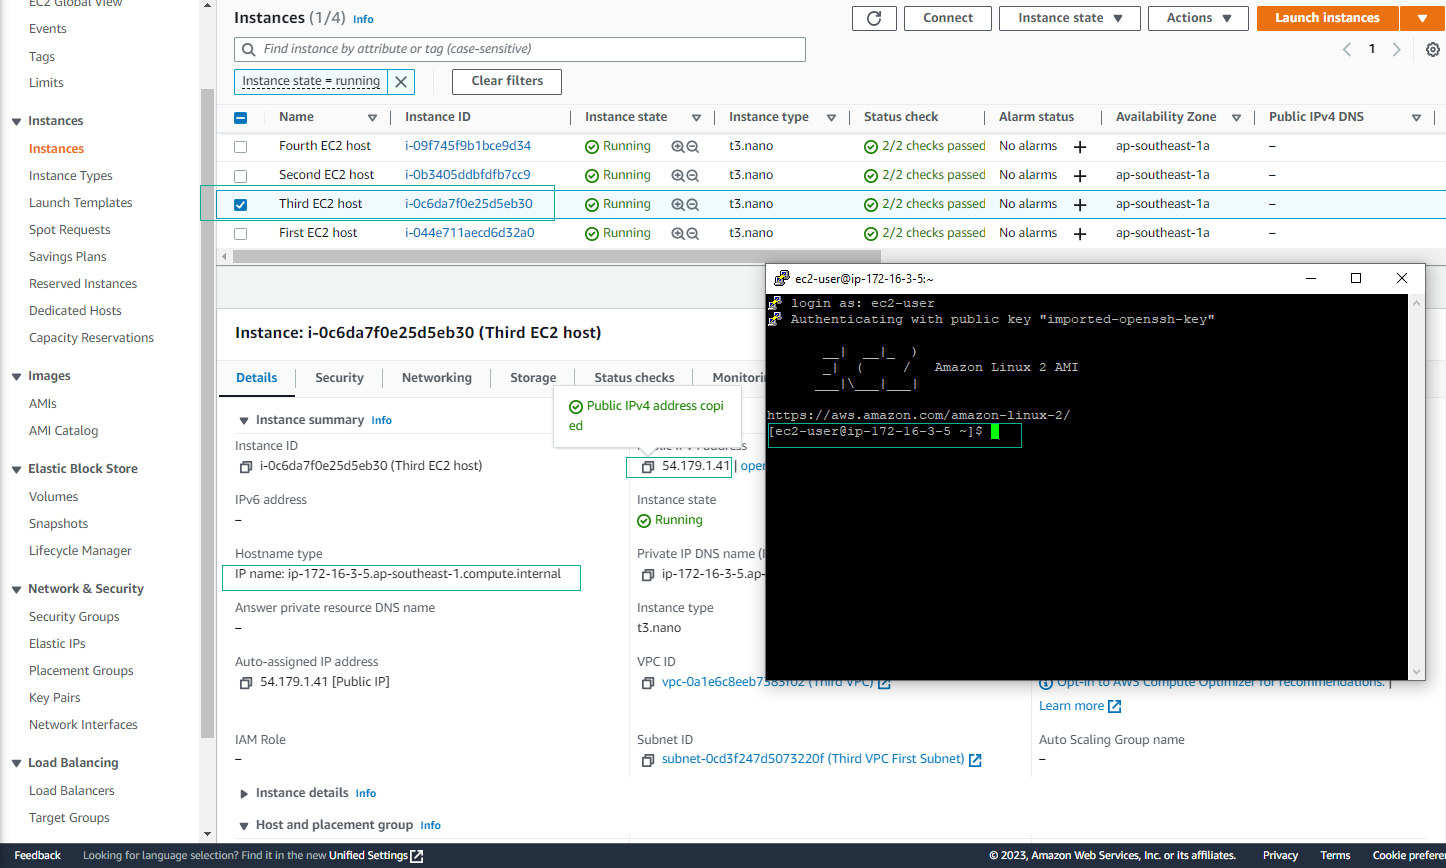
- Connect to VPC1 Instance
- Use SSH to connect to the EC2 instance in VPC1
- Verify internet connectivity with ping test

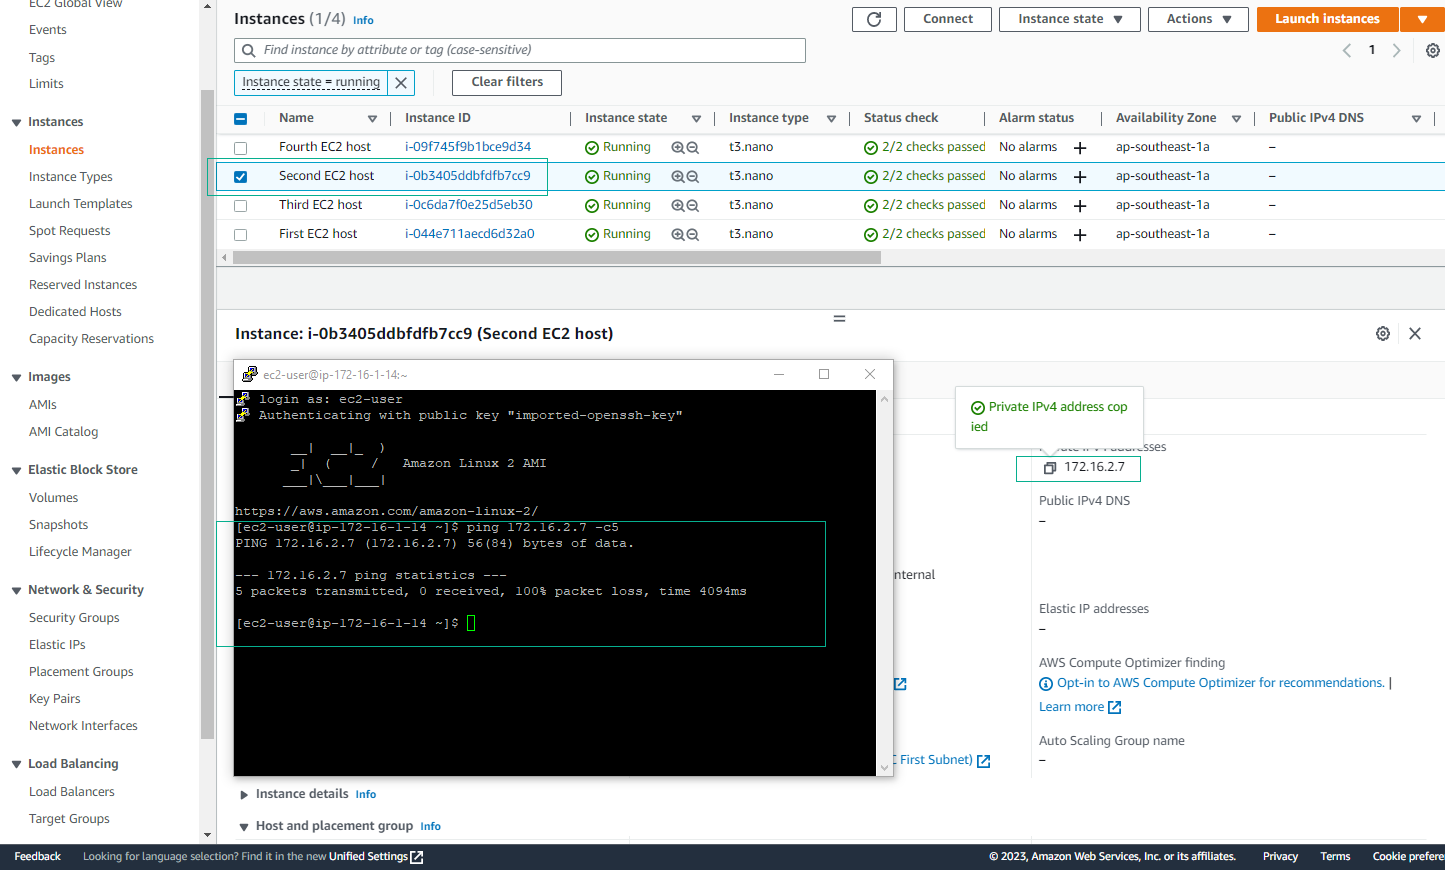
- Test Inter-VPC Connectivity
- Attempt to ping instances in other VPCs
- Note that pings will fail at this stage
ℹ️ Information: The ping tests will fail because we haven’t configured the route tables yet. This is expected behavior.
- Repeat for VPC3
- Connect to VPC3 instance
- Test connectivity to other VPCs
🔒 Security Note: Ensure your security groups allow ICMP (ping) traffic between the VPCs for testing purposes.