Create Transit Gateway Route Tables
Overview
ℹ️ Information: In this section, you will create and configure Transit Gateway Route Tables to control traffic flow between your VPCs. Route tables determine how traffic is routed through the Transit Gateway.
Create Transit Gateway Route Table
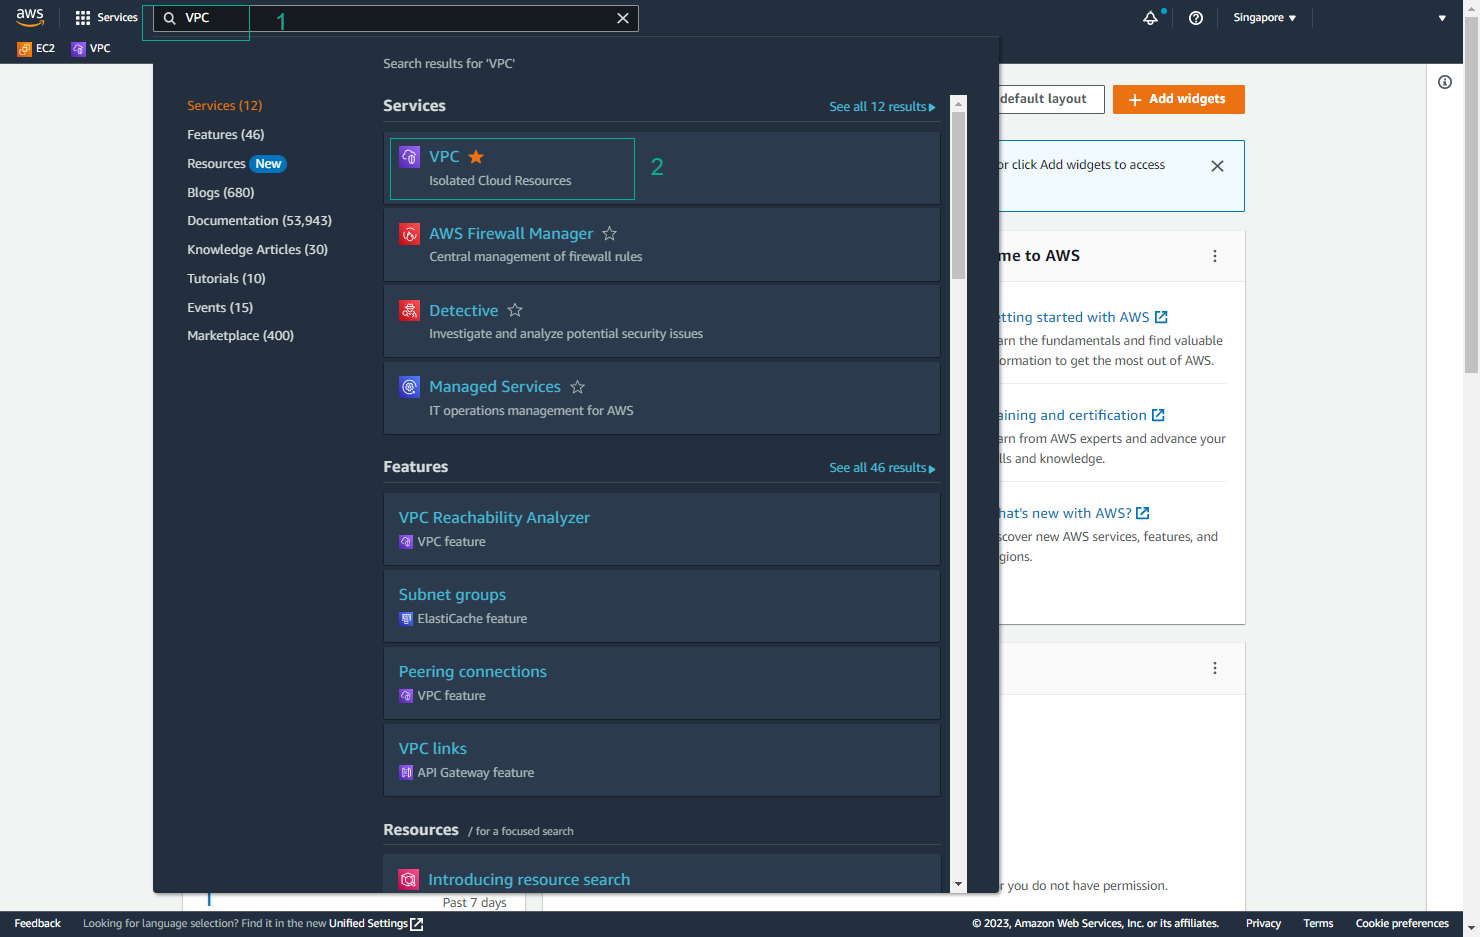
- Access VPC Management Console
- Open the VPC Management Console
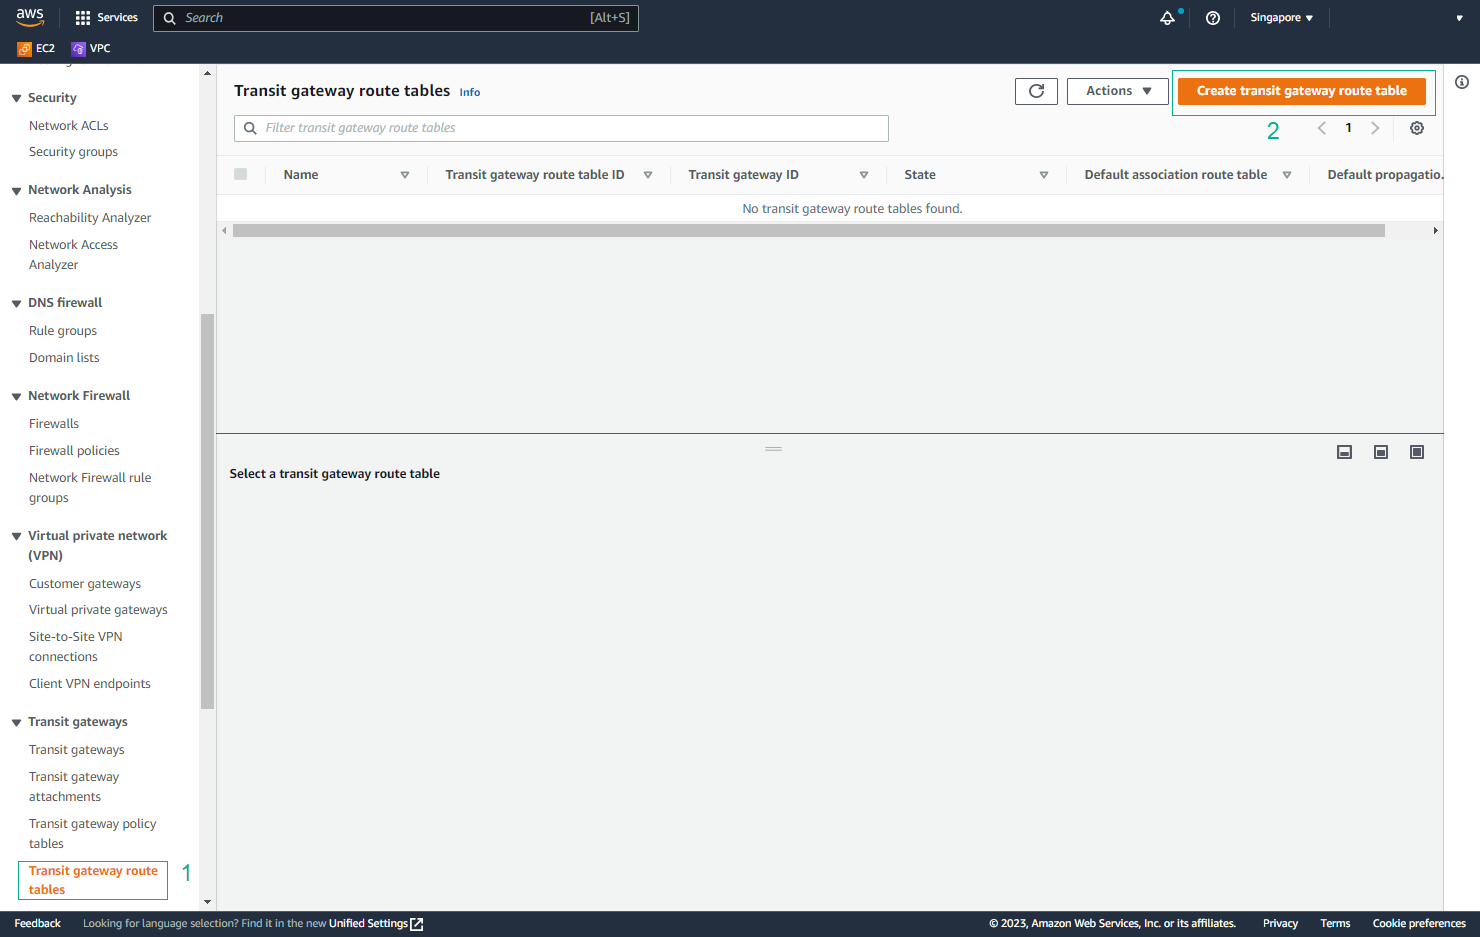
- Navigate to Transit Gateway Route Tables
- Create Route Table
- Select Create Transit Gateway Route Table
- This will be used to manage routing between VPCs
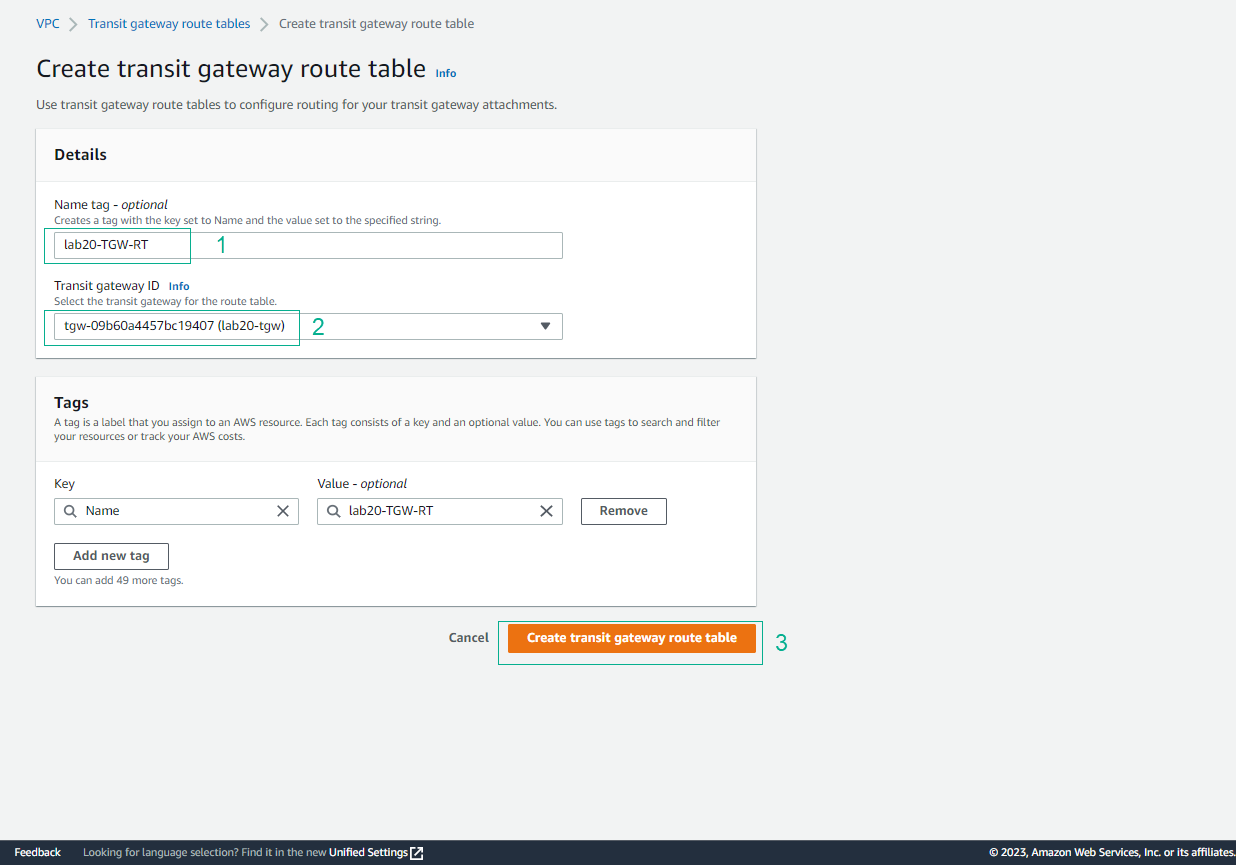
- Configure Route Table
- Name tag:
lab20-TGW-RT - Select your Transit Gateway
- Click Create Transit Gateway Route Table
- Name tag:
💡 Pro Tip: Use descriptive names for your route tables to easily identify their purpose.
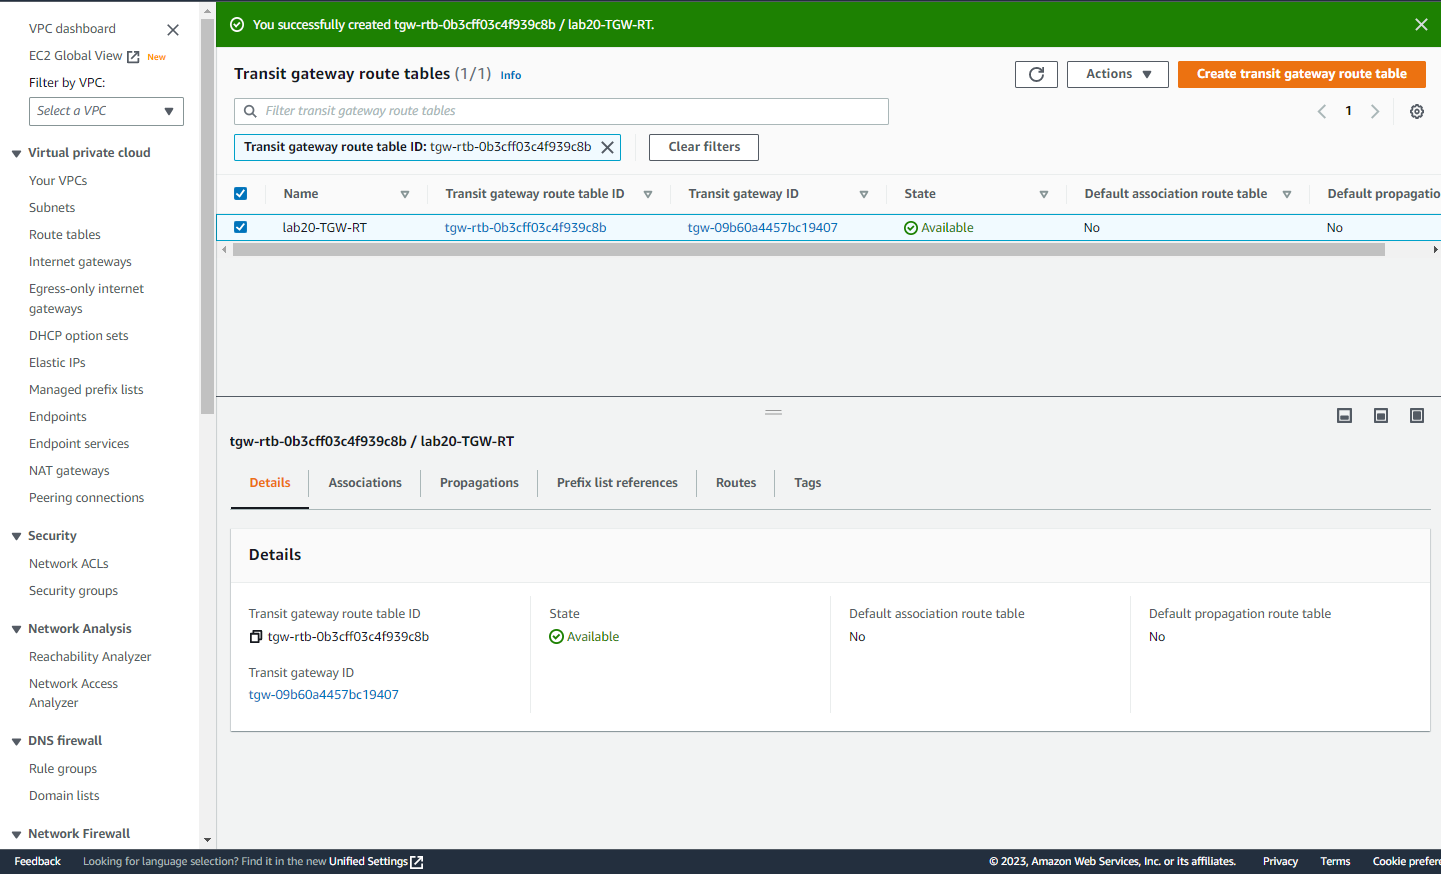
- Verify Creation
- Confirm the route table is created successfully
- Wait for the status to show as “available”
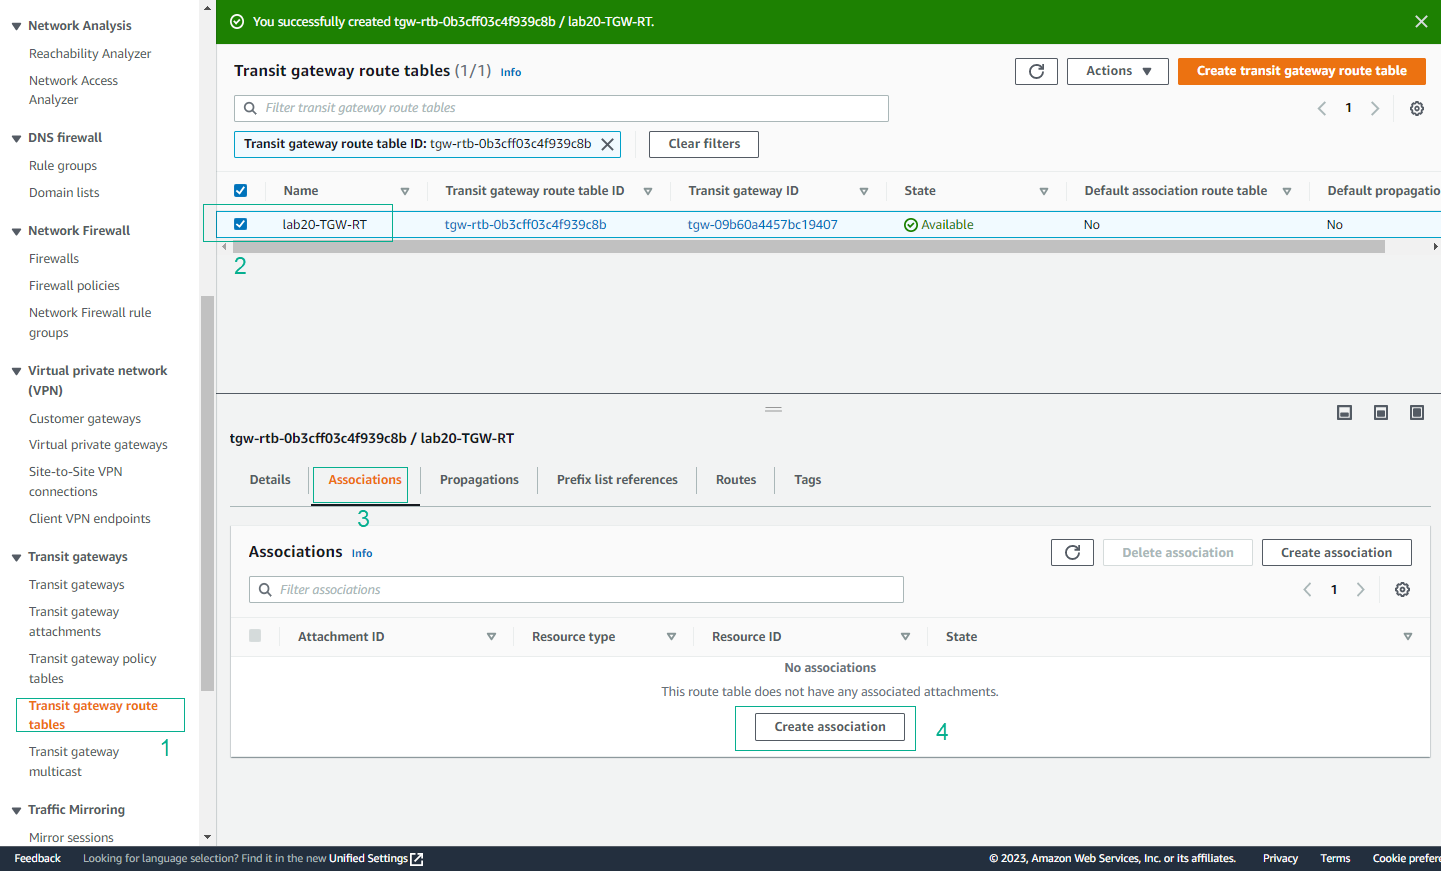
Configure Route Table Associations
- Access Associations Tab
- Select the created route table
- Navigate to the Associations tab
- Click Create association
ℹ️ Information: Associations determine which VPC attachments can send traffic through this route table.
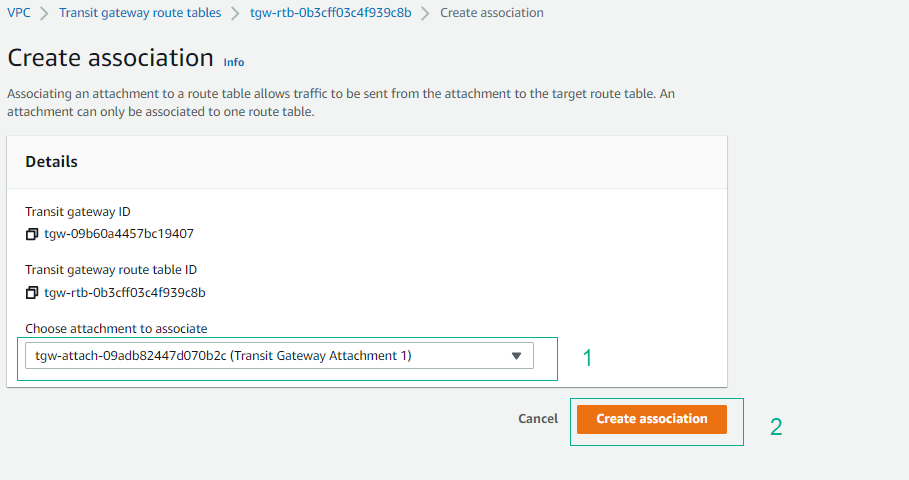
- Create Associations
- Select each VPC attachment in turn
- Create an association for each VPC
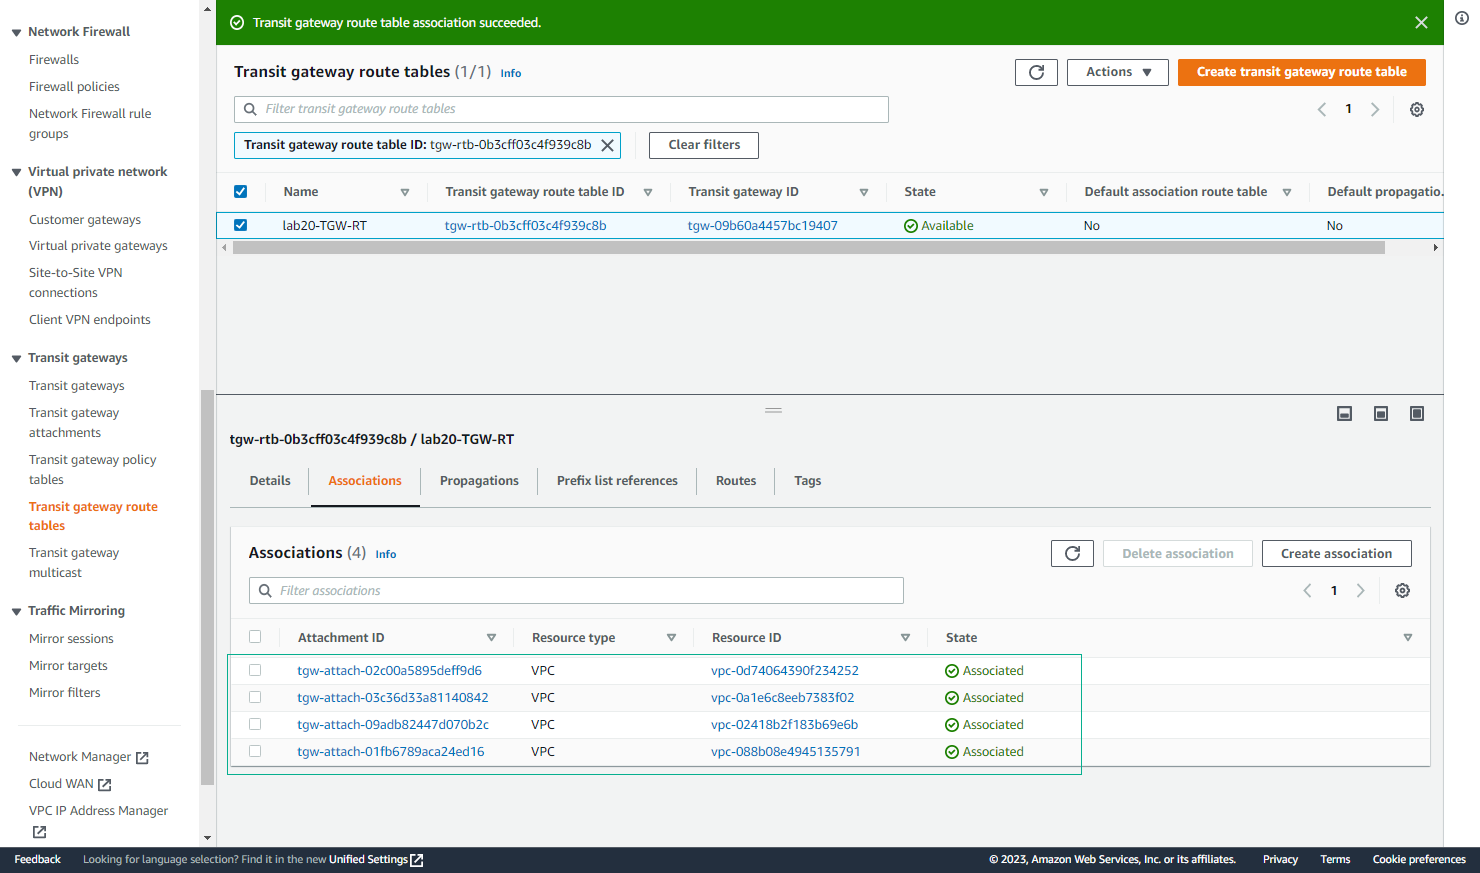
- Verify Associations
- Confirm successful association for each VPC
- All four VPCs should be associated
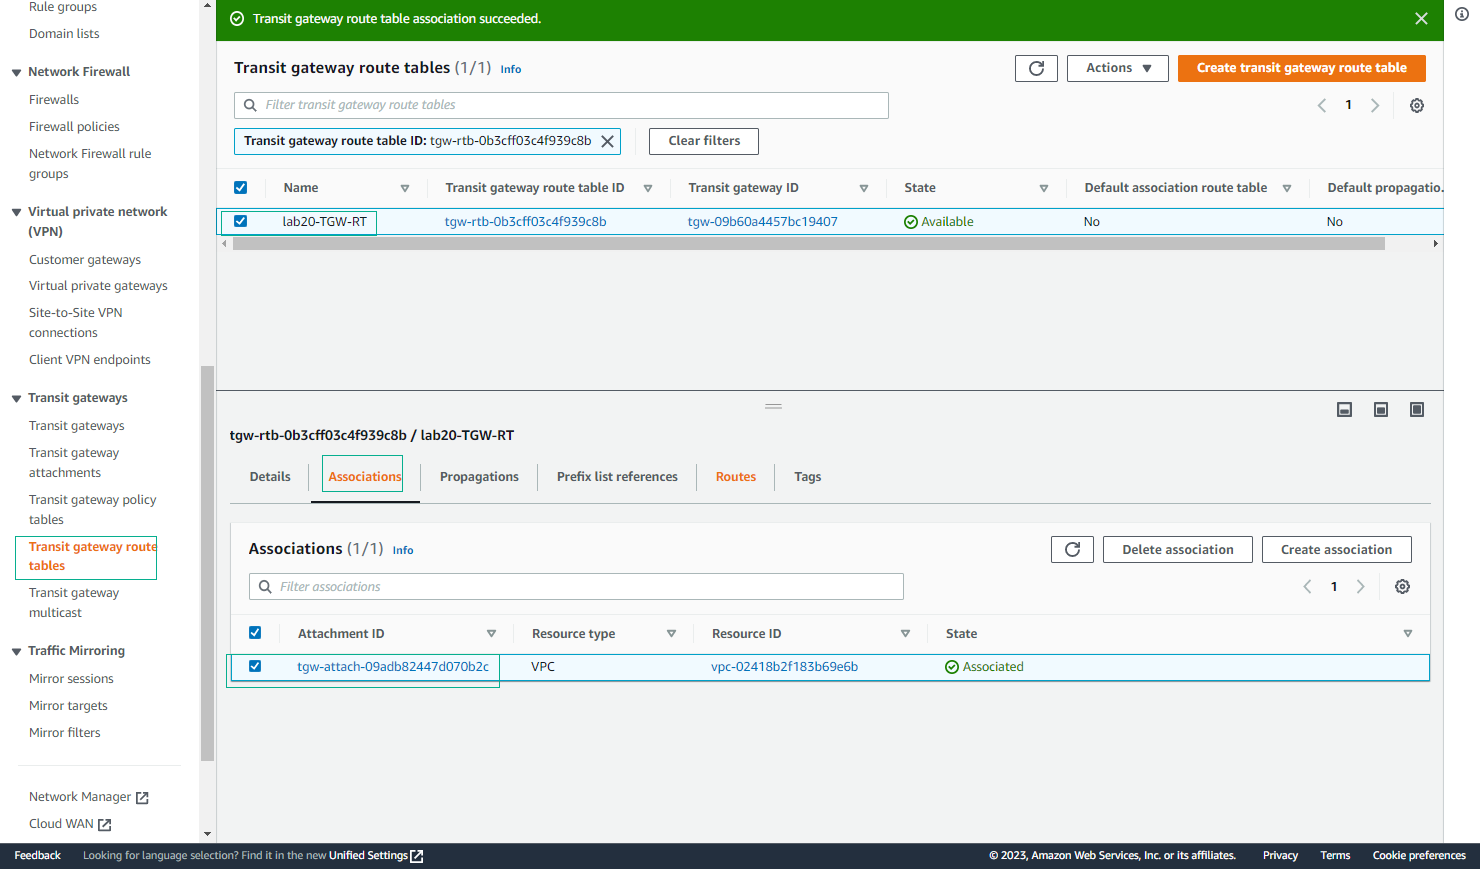
- Complete Associations
- Verify all four VPCs are associated with the route table
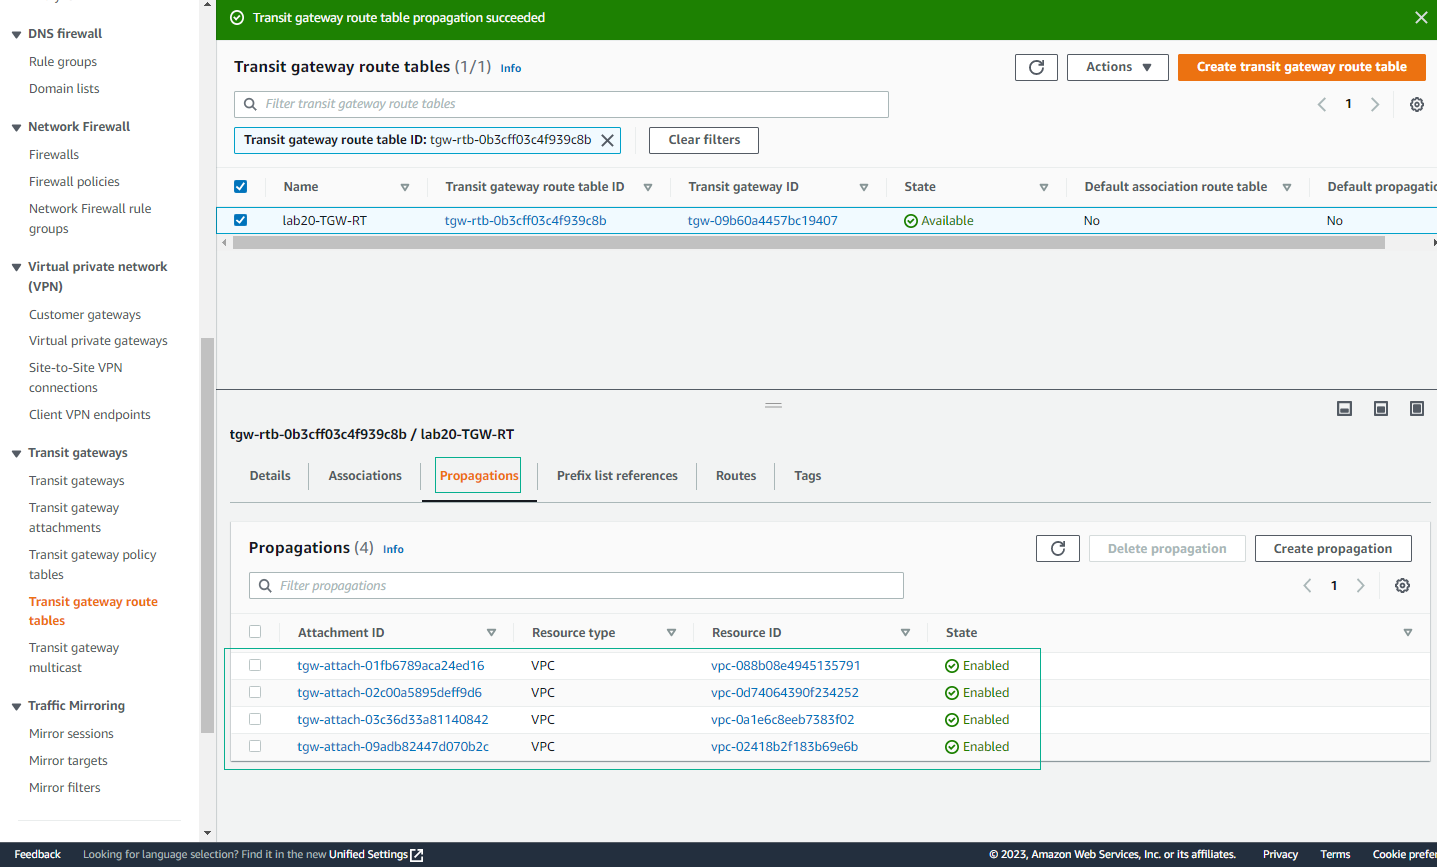
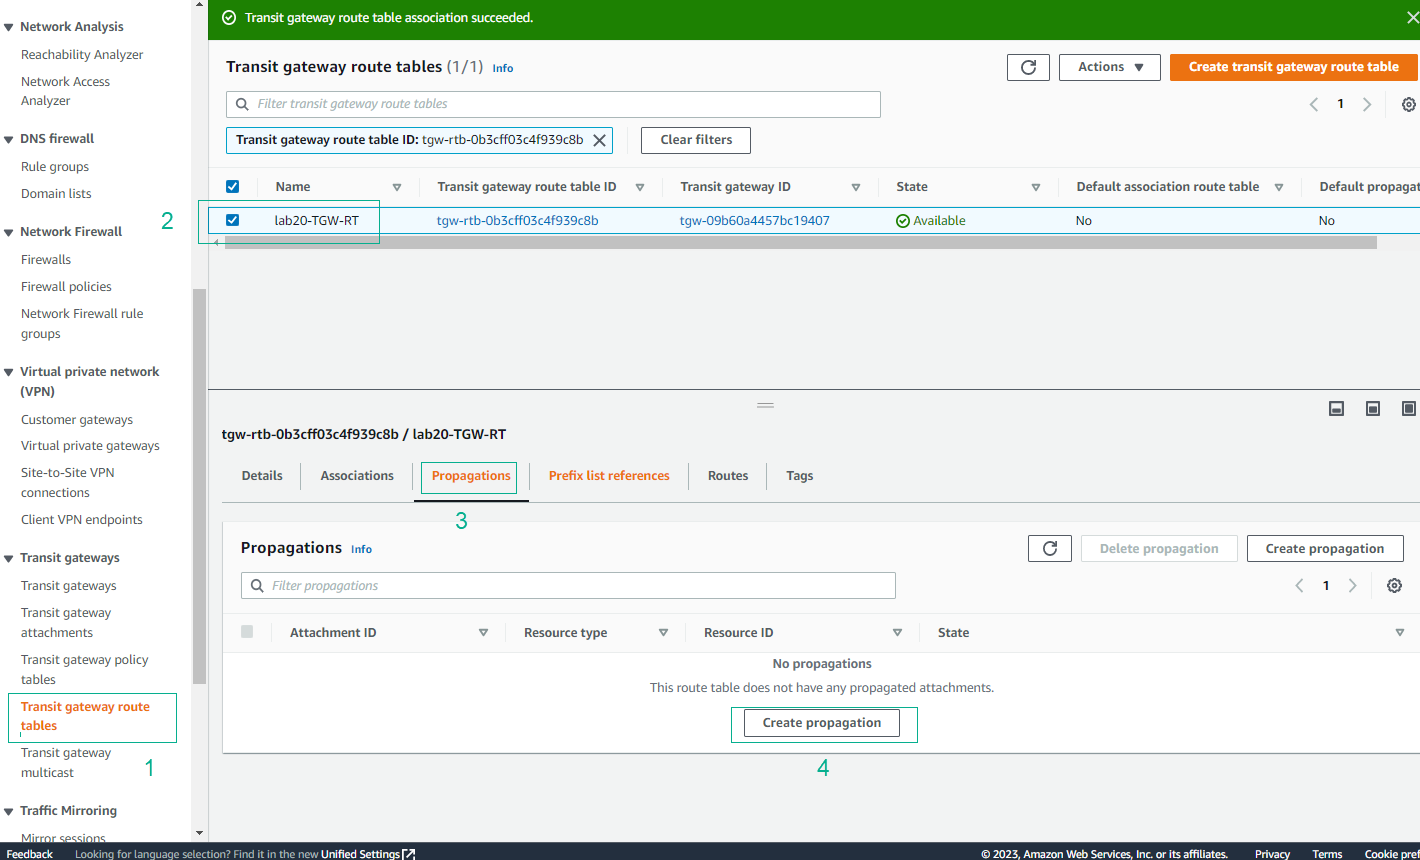
Configure Route Table Propagations
- Access Propagations Tab
- Switch to the Propagations tab
- Click Create propagation
ℹ️ Information: Propagations determine which VPC attachments can receive traffic through this route table.
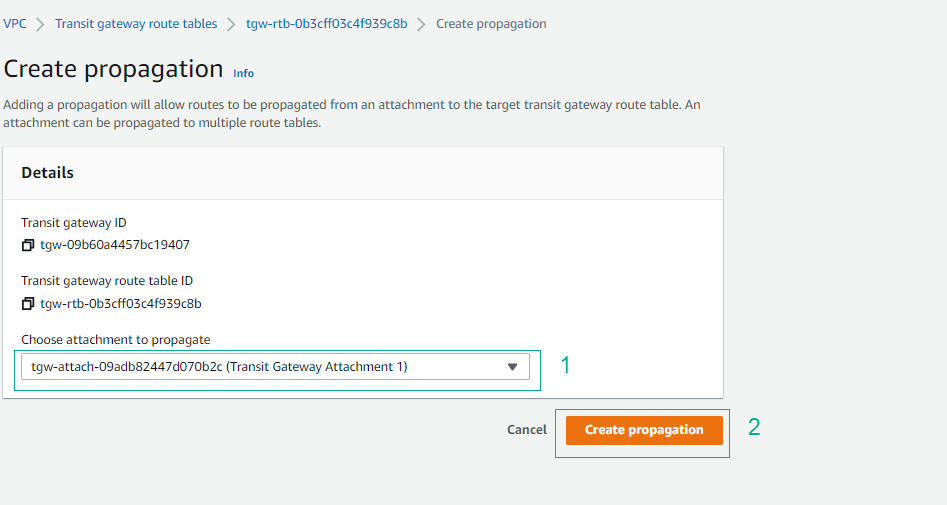
- Create Propagations
- Select each VPC attachment
- Create a propagation for each VPC
- Verify Propagations
- Confirm successful propagation for each VPC
- All four VPCs should be propagated
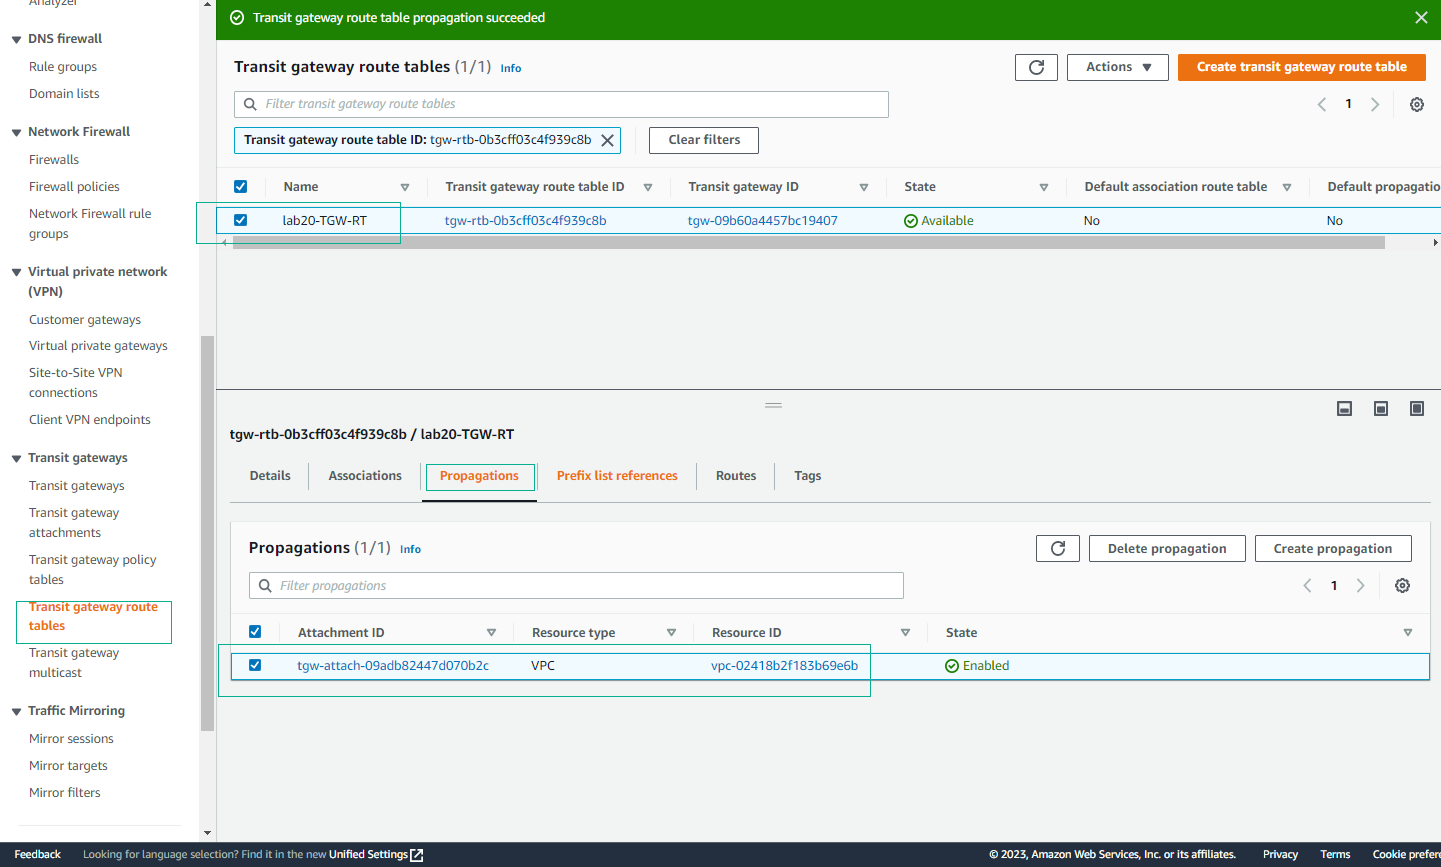
- Complete Propagations
- Verify all four VPCs are propagated in the route table
⚠️ Warning: Both associations and propagations must be properly configured for VPCs to communicate through the Transit Gateway.